How to set up an Auto-approval step (NetSuite)
In the main menu, select the Organisation for which you want to specify an Auto-approval step. Then go to "Approval Workflows" page under "Workflows and Settings" section. Select the respective workflow:

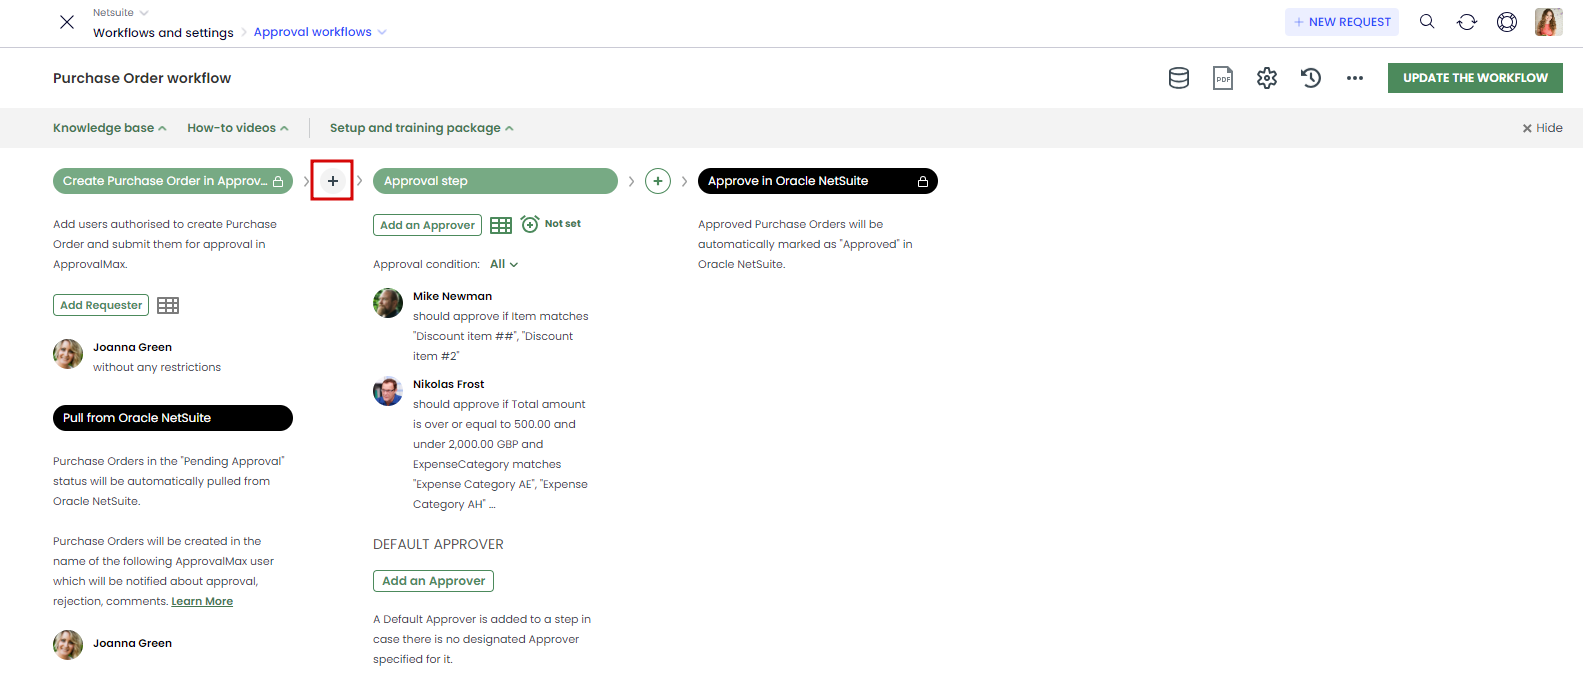
Open the workflow for which you want to specify an Auto-approval step and click on the “+” button to add one:
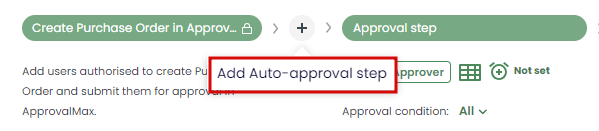
Then click on "Add Auto-approval step":
You can create this step either during the workflow setup, or later.
In the pop-up, click on ENABLE to start the Auto-approval step setup:

Click on HIDE to collapse the Auto-approval step. You can return to the setup later.
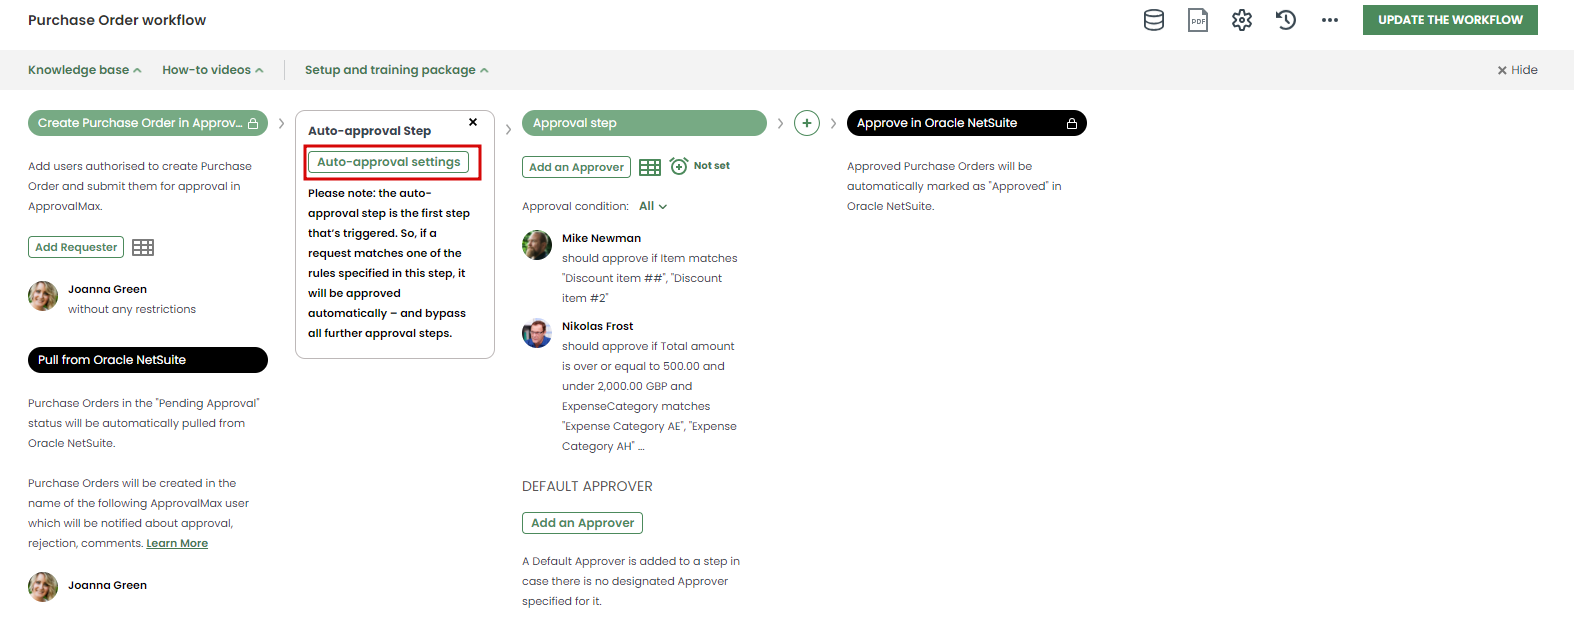
To proceed with settings, click on Auto-approval Settings:
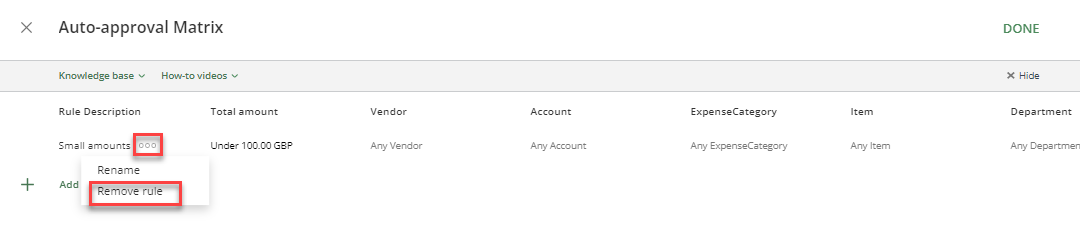
Add a rule description for Auto-approvals and set up the rules:

You can specify Auto-approval rules based on fields such as:
Vendor
Account
ExpenseCategory
Item
Department
Class
Location
Total amount


To delete a rule, click on the  icon and then on Remove Rule:
When ready, click on DONE to save your workflow settings.
 Please note: the rules in an Auto-approval step will be checked first. If the rules in the Auto-approval step are not met, the request will pass through the other approval steps.
If one of the rules in the auto-approval step is met, the request will be auto-approved.
Related Articles
How to set up an auto-approval step (QuickBooks Online)
In the main menu, select the Organisation for which you want to specify an auto-approval step. Then go to "Approval workflows" page under "Workflows and settings" section: Open the workflow for which you want to specify an auto-approval step and ...
How to set up an auto-approval step (Xero)
In the main menu, select the Organisation for which you want to specify an auto-approval step. Then go to "Approval workflows" page under "Workflows and settings" section: Open the workflow for which you want to specify an auto-approval step and ...
How to set up an Auto-approval step (Cin7 Core)
In the main menu, select the Organisation for which you want to specify an Auto-approval step. Then go to Approval Workflows under Workflows and Settings: Open the workflow for which you want to specify an Auto-approval step and click on the “+” ...
What is an Auto-approval step (Cin7 Core)
The Auto-approval step is an additional first step in workflows that's available during trial periods, Advanced Feature trial periods and in Advanced/Premium plans. In this step, you can enter conditions for the automated approval of requests ...
How does the approval of NetSuite Purchase Orders work?
ApprovalMax enables the setup of multi-step approval workflows for Purchase Orders. This is how the approval of Purchase Orders created in NetSuite works: Purchase Orders are created and submitted for approval in NetSuite or directly in ApprovalMax. ...